Materials Needed
To draw a Japanese cherry blossom tree, you will need paper and art materials such as markers, colored pencils, or charcoal. Depending on the complexity of the tree, it can also be created with oil paints or watercolors. Furthermore, it is recommended to use thicker paper (such as cardstock) to hold the amount of detail that goes into crafting an accurate shape of a tree. As for reference material, you can google or look for books or photos of cherry blossom trees to replicate.
Step-by-Step Guide
The first step in creating a cherry blossom tree is to sketch the branches using a pencil. To ensure the branches are in proportion to the rest of the tree, it is important to use a ruler to draw the main trunk and then start adding the minor branches. If the branches look too simple, you can begin to draw some S-shaped curves to create a more realistic effect of a tree.
Once the branches have been sketched out it is time to start working on the leaves. To make the leaves look natural, they can simply be indicated by adding a stroke of the pencil and if desired, some long and short strokes of a color pencil or marker can be added to create a dimension of a leaf. When the leaves are added to the tree, it is time to start working on the center of the tree: the flowers.
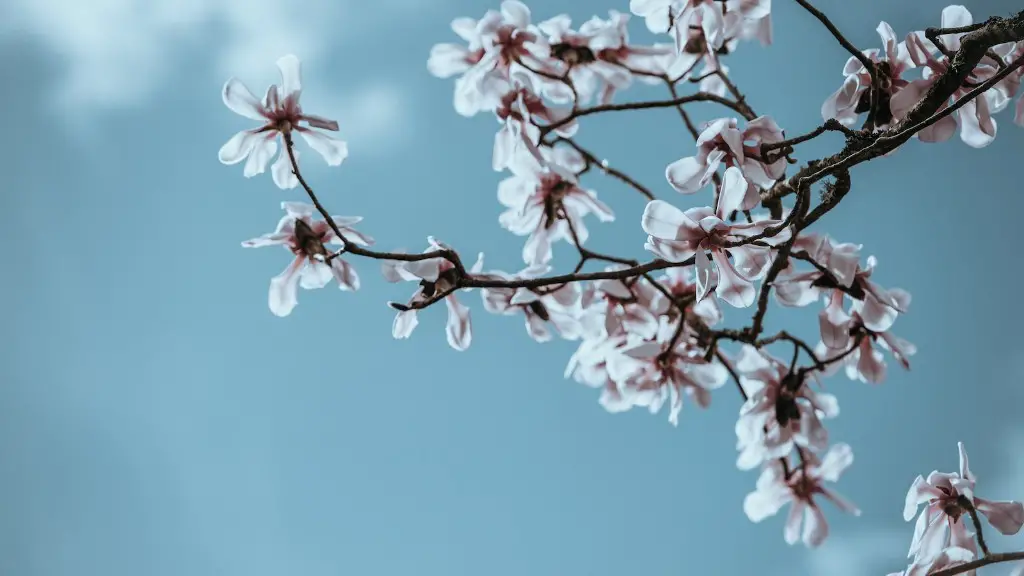
Gently grabbing a small brush, and dip it into the color of choice for the flowers. Working around the branches, begin to fill in the tree with the desired color, adding one petal of the flower with each touch of the paintbrush. Use a slightly darker color for the stamen to bring a deeper contrast to the blossom. If a bolder effect is desired, add more layers of paint, and you can either use the same color to build up density or add an additional flower color to indicate multiple flowers, as is common in cherry blossoms.
Once the tree is complete, the drawing can be finished off by adding a light color around the backs of the flowers which will give a romantic feel, and the drawing can be further enhanced with a dash of a different color in the center of each flower. As a final touch, you can finish the drawing with a few hanging petals of brighter colors, or a hint of pink that adds the mood of a romantic summer night.
Tips and Tricks
Some tips and tricks to help in creating a Japanese cherry blossom tree drawing is to use texture to bring the drawing to life. One of the ways to add texture is to use crosshatching, which is done by repeating light and dark lines in a crisscross pattern. This creates a sense of depth and emphasizes the flowers which stands out against the branches and leaves. Additionally, you can use the drop shadow technique to create and emphasize the difference between a flower, a leaf and a branch.
For the leaves and flowers, if you want to be creative and create interesting shapes, consider adding light shadows around your shapes. This will help to soften the effect and make the drawing look more realistic. Lastly, when it comes to adding leaves, consider adding some short dabs of color as this will help to bring the entire look of the tree together.
Color Palette
When choosing the color palette for a cherry blossom tree, consider hues of pink or red for the petals for a vibrant and lively look. You can then build on the tree by adding a variety of shades of green for the leaves, or choose a gold or white to create a beautiful sunset look. In addition to the petals, you can also add other shades of color to create a unique look, such as purple or a pastel yellow.
Finishing Up
Once the drawing is completed, you can choose to add a few more finishing touches to make it pop against the paper. To add a few more details and textures, consider using highlighting, where you add a dab of white paint to the tree in certain areas to create a sense of light. You can also add a few splashes of watercolor to the background to give a dreamy effect.
Finally, to create a glossy look to the tree, use a glossy varnish to give a subtle sheen to the drawing. This will make the drawing look almost like an oil painting and will make the flowers look extra lush and vibrant.
Textures
As discussed, textures help to bring the drawing to life; use different techniques to create various patterns and looks for the petals. For example, for petals around the edges of the tree, consider using the crosshatching technique to make the effect of a petal curling towards the center of the blossom.
To add a bit of contrast, use stippling technique – where you place small dots of paint on the petals to add texture and uniqueness. You can also add texture to the leaves by stippling with a darker paint to create shadow around the sides. Note to ensure the overall look of your drawing is realistic; it is important to not over-use these techniques as they may be a distraction.
Adding Details
When adding petals, it can be tempting to just add them randomly. However for a more professional look, consider defining the details by varying the size of petals – larger petals towards the center and smaller towards the edges. It is also important to consider the tone of the petals – larger petals in the center should be created with slightly brighter colors, and smaller on the edges of the tree should have a softer tone to give an effect of fading petals.
In addition, for realism, consider adding petals to just one side of the tree – this effect is commonly seen in nature. Furthermore, adding petals on the ground adds to the composition and adds a sense of vitality and movement to the painting.
Background
To create a more dynamic drawing, consider adding a palette of colors in the background, such as a soft purple of a sunset, to add contrast to your tree. This helps to create a sense of movement and mood. The background should not be too busy, however one color changing to another color softly can help to bring the drawing together.
It is recommended to choose colors that are complementary to the colors used in the tree. For example, if you used pink and green in the tree, opt for blue in the background and to further bring the painting together, use light violet shades with some bright tones in the center and darker tones blending out towards the edges.

