Gather Your Supplies
Paintings are like puzzles – you need to assemble the right pieces before you start. Painting a cherry blossom tree requires supplies like acrylic paint, brushes, a support, canvas, and a palette. To select the best paint for your canvas, consult a professional on the brand, pigment, and the best color for blending. Experts recommend fine-bristled brushes, as they are best for both detail work and blending. Your support can be wood, cardboard, or canvas, depending on your preference and the size of the painting. While a palette can be simply a paper plate, an art supply store has full ranges of sizes and shapes for your project.
Know Your Color Palette
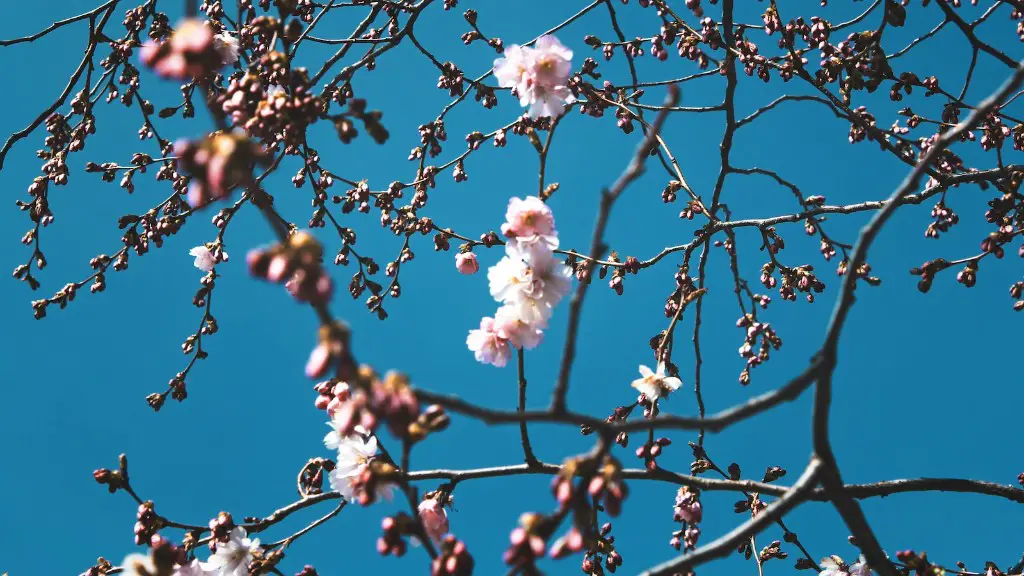
Before you start mixing colors, familiarize yourself with the colors associated with a cherry blossom tree. The petals of the tree evoke all shades of pink, while the branches, leaves, and trunk may include browns and greens, especially in a dark image. If you’re doing a more abstract or dreamy painting, the colors may be pastels like light pink, blue, or even hints of yellow.
Start With the Sky
Often, artists start painting the sky first. Choose shades that evoke the emotion you want to portray and mix until you’re satisfied with the result. Many like using paints in a wash-like fashion and applying layers to get the desired outcome. If your sky needs a different color, blend more paint onto the canvas to adjust it.
Begin the Tree
Now, it’s time to add some life to your painting. Place the trunk and branches first – the cherry blossoms will go in later – so plan the shape you have in mind and make sure it fits the concept of the painting. To create more realism, add shadows and highlights to the branches, stalks, and trunk area with a brush and paint.
Add the Blossoms
Next, layer petals of the cherry blossoms on the branches. Experiment with different sizes on the canvas and blend a colored layer of flowers around the focal points. Working with an evenness of tones will give the petals a dreamy look, but don’t be afraid to use brightness to add contrast to the other branches and stalks.
Accentuate the Details
Let your painting move forward by adding dramatic details like stamens, moss, or other plants to the canvas. Add depth to the painting by adding depth around the trees with a mixture of browns, greens, and neutral colors.
Finish the Painting
Once you have all the elements of your painting in place, it’s time to adjust any parts of it that need fine-tuning. Think about any areas that could use some other colors or highlight to make the painting stand out. Once you’ve finished, let the painting dry and add a light protective glaze if needed.
Building a Cherry Blossom Tree with Acrylics: The Underpainting
To begin to build the painting, it is important to establish the correct values for the painting. This stage is referred to as the underpainting, and involves laying down a flat wash of light colors such as yellow, pink, or blue over the entire canvas in order to establish the basic lights and darks of the painting. The underpainting helps the artist visualize the contrast and values of the painting, and lets them map out their color shades for the areas of light and dark.
Understanding Color Blending for Cherry Blossom Trees
Successfully blending colors for your cherry blossom tree painting will allow you to create a natural and realistic image of your blossoms and branches. One of the key techniques used when creating these trees is scumbling, which is the practice of painting lighter colors over darker colors, such as a light pink over a gray. Another technique is wet-on-wet, which is using two colors that are wet at the same time and mixing them on the canvas and creating various color activities.
The Value and Brush Work of Cherry Blossoms
When painting your cherry blossom tree, it is important to remember that the petals and branches should have value changes and different sizes of brushstrokes. These value changes can be created by varying the pressure that is applied to the canvas, as well as shifting colors from dark to light and back again in order to create more dimension and texture. Working with different sizes of brushes also helps create a more realistic effect, as the larger brushes can be used for the trunk and branches, and the finer brushes for the small petals.
Adding Shadows and Highlights
The shadows have a big impact on the realism of your painting, as the contrast between light and dark can lead to the illusion of light. This contrast can be created by painting in the shadows with a shade slightly darker than the light area, while the highlights can be achieved by using a slightly lighter color. This can be done by blending colors with a brush, as well as painting out sections of light and dark colors with a wash or a glaze.
Make It a Masterpiece
The final touch is to add a few extra touches to make your painting unique. Artists often use a few of their own inventions like the addition of a bird, butterfly, or even an entire background. Remember to emphasize the focal point of the painting and draw the viewer by making sure the brightest part is the cherry blossoms. With a few more details and touches, you can make your painting a true masterpiece.


